Replacing factory door speakers is one of the most effective upgrades you can make to a vehicle's audio system. The process is straightforward on most vehicles — but there is one common obstacle that catches a lot of people off guard. Before you start, take a close look at your door and panel to understand what is involved. Some manufacturers do not just use screws to hold the speaker in place. Stamped metal brackets, rivets, or OEM mounting pieces can complicate the swap. If it does not look manageable, get a professional installer to help.
MTX Audio — factory replacement door speaker installation walkthrough
The Factory Bracket Problem
This is the thing most guides skip over. On many vehicles — especially trucks and newer cars — the factory speaker is not mounted directly to the door skin. It is held in by a stamped metal bracket that is specific to the OEM speaker's bolt pattern. When you hold up your new aftermarket speaker to that hole, the mounting holes do not line up.
You have three options when this happens:
Speaker adapter bracket — the best option for most installs. Companies like Scosche, Metra, and others make vehicle-specific adapter brackets that bolt to the factory location and accept standard aftermarket speaker bolt patterns. Search by year, make, and model to find one for your vehicle.
Fabricate a mount — if no adapter exists, a flat piece of MDF or metal can be cut to bridge the factory bracket holes and the speaker's bolt pattern. This takes more time and skill but works well.
Fiberglass or custom work — for a finished, clean appearance, especially in visible locations. Best left to experienced installers.
Don't skip the adapter
A speaker that is not properly secured will vibrate against the door, rattle at volume, and can work itself loose over time. Always use the correct adapter or fabricate a solid mount — never rely on tape or zip ties to hold a woofer in place.
Installation Steps
1
Disconnect the Battery
Remove the negative battery terminal before touching any wiring.
2
Remove the Door Panel
Locate and remove all screws — including hidden ones behind trim caps and in the door pull. Use a panel removal tool for snap-fit clips to avoid breaking them. Disconnect all wiring harnesses (window switches, locks, lighting) before fully pulling the panel.
3
Assess the Factory Mounting
With the panel off, check how the factory speaker is mounted. Is it screwed directly to the door skin, or is there a stamped metal bracket? Hold your new speaker up to the opening and check whether the bolt patterns align. If they do not, source a vehicle-specific adapter bracket before continuing.
4
Remove the Factory Speaker
Unscrew the factory speaker, disconnect the factory wiring, and remove it from the door. If installing a component system with a separate crossover, cut the factory speaker wire with enough length to reach the crossover's input — you will splice to it.
5
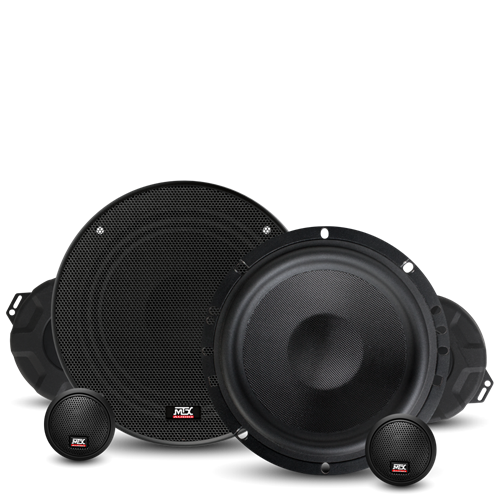
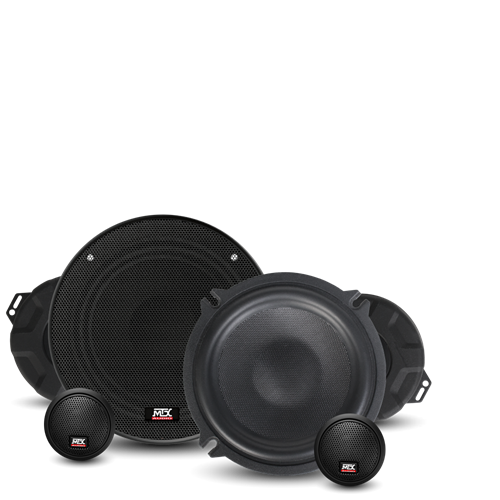
Plan Crossover Placement (Component Systems)
If installing a component speaker set, the crossover needs a home inside the door before anything else is wired. The key constraints:
Must not interfere with the window mechanism — cycle the window up and down to see where it travels
Must not be pinched when the door closes — check clearance against the door jamb
Must be reachable for the woofer and tweeter wire runs
The inner door skin (the side facing you when the panel is off) is usually the best location. Attach the crossover with screws or zip ties through the mounting tabs.
6
Wire the Crossover
Connect the factory speaker wire to the crossover input. Connect the woofer output wire to the woofer terminal on the crossover, and the tweeter output wire to the tweeter terminal. Run all wires before mounting the speaker so you are not working blind once it is in place.
7
Mount the Woofer
Install the adapter bracket to the door first, then bolt the speaker to the adapter. Tighten evenly around the frame for a good seal. Connect the woofer wires to the speaker terminals, observing correct polarity.
8
Mount the Tweeter
Most component sets include hardware for multiple mounting options. Choose the method that works best for your vehicle and listening preference.
Tweeter Mounting Options
Sail Panel / A-Pillar
The most common and best-sounding location. Aims the tweeter toward the listening position for better imaging. Requires drilling a hole in the sail panel trim piece.
Door Panel Surface Mount
Mounts flat against the door panel surface using the supplied bracket. No drilling into the vehicle. Quickest option but the tweeter is visible and lower on the door.
Flush Mount in Door Panel
Cut a hole in the door panel and flush-mount the tweeter for a clean factory look. Takes more time but produces the best visual result.
Imaging tip
Tweeter position significantly affects soundstage. Higher placement aimed toward the listening position (sail panel or A-pillar) produces a wider, more natural soundstage than a low door-mounted tweeter. If you have the option, aim for the higher location.
9
Reinstall the Door Panel
Reconnect all wiring harnesses before snapping the panel back in place. Check that no speaker or crossover wires are routed where they could be pinched by the panel or window mechanism. Engage all clips and reinstall all screws.
10
Reconnect Battery and Test
Reconnect the negative battery terminal. Power up the system at low volume and confirm clean output from both woofer and tweeter on all installed doors. Cycle the window up and down to confirm nothing is interfering with the mechanism. Adjust head unit bass and treble settings to taste.